Roblox has grown into a massive platform with millions of players spending real money on in-game purchases every day. Whether you’re grabbing a limited-time avatar item, upgrading a game pass, or supporting a creator, your transactions add up fast. The problem? Many players have no idea where their money’s going or how to check what they’ve actually spent. This guide walks you through accessing your Roblox transaction history, understanding what you’re paying for, and, most importantly, taking control of your spending so you don’t get blindsided by unexpected charges.
Key Takeaways
- Access your Roblox transaction history through Settings > Billing on desktop or Settings > Billing in the mobile app to monitor exactly what you’re spending on Robux, game passes, and cosmetics.
- Enable two-factor authentication in Settings > Security to prevent unauthorized access and fraudulent transactions, even if someone obtains your password.
- Set a monthly Roblox spending budget and use parental controls like account PINs or prepaid gift cards to control impulse purchases and unexpected charges.
- Report fraudulent charges within 30 days of discovery to maximize your chances of receiving a refund from Roblox support.
- Recognize common scams like free Robux promises, item duplication offers, and fake account recovery links—never share your password or trade valuable items to strangers.
- Review your linked payment methods monthly and remove any cards you don’t recognize, as this is an immediate sign your account may be compromised.
Understanding Roblox Transactions: What You Need to Know
Before you can manage your spending, you need to understand what’s actually happening when you buy something on Roblox. The platform has multiple ways to pull money from your account, and each one works a little differently.
Types of Roblox Transactions Explained
Roblox transactions fall into a few main categories. Direct Robux purchases are the most common, you’re buying premium in-game currency that you then spend on items, passes, or creator exchange. These are one-time purchases that show up immediately in your account.
Game passes are recurring or one-time fees that unlock perks within specific games. You might pay a few hundred Robux for a permanent speed boost, or subscribe to a monthly battlepass for continued rewards. These can be set to auto-renew, which catches a lot of players off-guard.
Limiteds and in-game items are cosmetics or tools you buy directly from games. These vary wildly in price and often feel like impulse buys in the moment.
Catalog purchases work similarly, avatar items, bundles, and accessories you grab from the main marketplace. The distinction matters because your transaction history breaks these down separately.
Subscriptions and premium memberships like Roblox Premium auto-bill monthly. If you signed up thinking you’d cancel later, you’ve probably forgotten about it by now.
Currency Systems in Roblox
Roblox uses Robux as its primary in-game currency. You can earn it through game development and creator exchange, but most players buy it with real money. The exchange rate stays constant: spending $4.99 nets you 400 Robux, $9.99 gives you 800 Robux, and so on. The platform also offers occasional bonus Robux during promotions.
Premium membership is a separate subscription that gives you a daily Robux stipend, plus access to the premium catalog and an extra sales slot if you’re selling limited items. At $4.99/month (or $49.99/year), it’s a major transaction for younger players and their parents who don’t monitor it.
Understanding which currency system you’re using helps when you’re reviewing charges. If you see a charge for $9.99 but only remember buying 800 Robux, you might have also renewed Premium without realizing it.
How to Access Your Roblox Transaction History
Finding your transaction history is the first step to taking control. The good news: it’s straightforward once you know where to look. The process differs slightly depending on whether you’re on desktop or mobile.
Finding Your Transaction History on Desktop
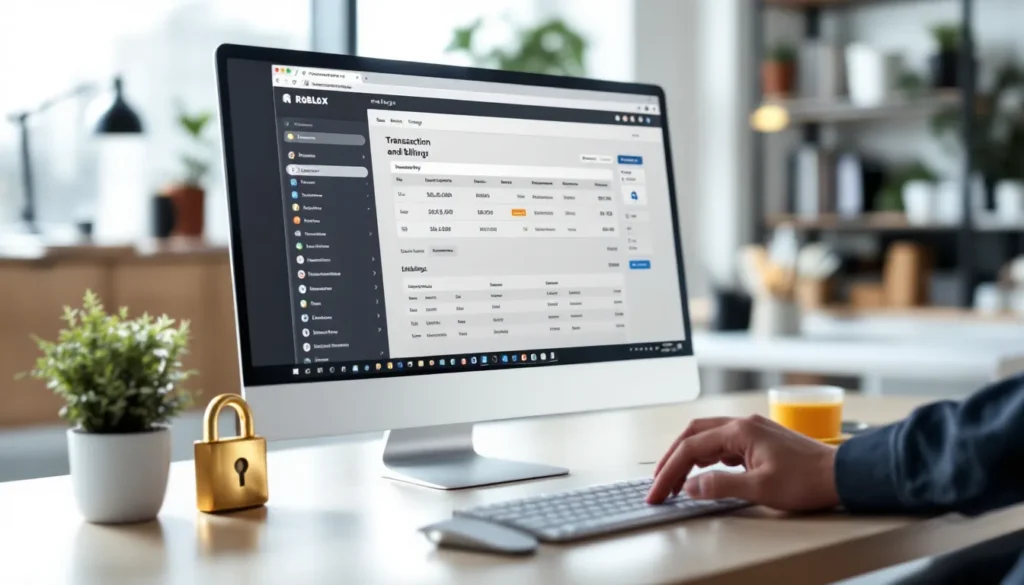
Start by logging into your Roblox account on any web browser. In the top-right corner, click your profile icon or avatar image. A dropdown menu appears, scroll down and select Settings.
On the Settings page, look for the Billing tab on the left sidebar. Click it, and you’ll land on your billing dashboard. Here, you see all your recent transactions listed chronologically. Each entry shows the date, item or service purchased, and amount charged.
If you want more detail on a specific charge, click on any transaction to expand it. You’ll see the order number, payment method used, and status (completed, pending, refunded, etc.).
To export or filter your history, look for the View All Transactions link if you need to go back further than the default view. Some older charges may not show up if they’re beyond a certain timeframe, typically one to two years.
Accessing Transactions on Mobile Devices
On mobile (iOS or Android), the process is nearly identical. Open the Roblox app and tap the three-line menu icon at the bottom-right. Select your profile name to enter your profile page.
Tap Settings (the gear icon), then scroll down to find Billing. Tap it to see your transaction history in the same format as desktop. You may notice the mobile version is slightly more condensed, swipe left on a transaction to see additional options like disputes or refund requests.
One note: if you’re using Roblox through a web browser on mobile rather than the app, the steps mirror the desktop process. The mobile app experience is cleaner for quick checks, but the web version gives you more detailed filtering options if you’re doing a deep jump into spending history.
Step-by-Step Guide to Reviewing Individual Transactions
Once you’ve found your transaction history, the next step is understanding what each entry actually tells you. This matters because some charges aren’t always obvious, and you need to spot discrepancies.
Identifying Transaction Details and Dates
Each transaction entry includes several key pieces of information. The date is straightforward, it’s when the charge was processed, not necessarily when you made the purchase (sometimes there’s a 1-2 day lag). The amount shows exactly what you paid in your local currency.
The description varies. A Robux purchase might say “800 Robux + Bonus,” while a game pass shows the game name and pass type. Creator exchanges and payouts appear here too if you’re a developer. Some transactions get cryptic, you might see internal order codes instead of clear product names, which is why you may need to cross-reference with your Roblox inbox or recent purchases.
The order ID is crucial if you ever need to dispute a charge. Write it down if you’re reporting something. Your payment method (credit card last four digits, PayPal, Google Play, etc.) also appears here, this helps you spot if a fraudster used a different payment method than usual.
Understanding Transaction Statuses
Transactions come in a few statuses. Completed means the charge went through and you got what you paid for. Pending means the payment is processing, this can take 24-48 hours, especially for bank transfers. Don’t panic if you see a pending charge: it’ll either complete or reverse automatically.
Refunded shows charges that were reversed, either by you or by Roblox. Failed transactions never charged you, your card might have been declined, or Roblox flagged the purchase as suspicious.
If you see a charge with a status you don’t recognize, or if something shows as completed but you never received the Robux or item, that’s a red flag worth investigating. Note the transaction ID and contact support.
Managing Spending and Setting Parental Controls
This is where things get serious. If you’re a player dropping serious cash on Roblox, or a parent watching your kid’s spending spiral, you need to take action now. The platform offers several tools to keep things under control.
How to Set Spending Limits on Your Account
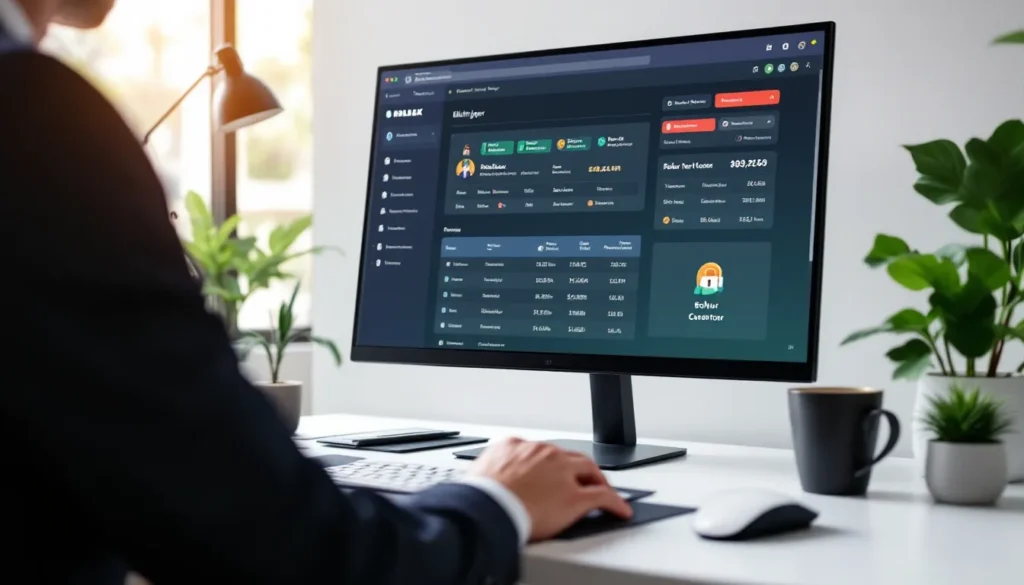
Unfortunately, Roblox doesn’t offer built-in per-month spending caps on the platform itself. Your best bet is controlling the payment method. If you’re the account owner, go to Settings > Billing and review what payment methods are linked. Remove any cards you don’t want used, or link a prepaid card with a limited balance instead of your main credit card. This is a simple friction point that stops impulse purchases.
If you use a third-party payment method like Google Play or Apple Pay, both ecosystems have parental control options (see the section below). You can also set purchase limits directly in those apps, which then limits what can be spent on Roblox.
Another tactic: set a budget in your head and only buy Robux in batches. Don’t leave your account funded with unused Robux sitting around, if it’s there, you’re more likely to spend it. Buy only what you need for a specific purchase, then wait before buying more.
Parental Controls for Young Players
If a child has the account, parental controls are non-negotiable. Roblox has its own parental control system, but it’s limited. Here’s how to set it up:
Go to Settings and scroll down to Parents. You’ll see a section for restricting chat, filtering games, and managing account security. You can disable chat entirely, which removes a huge vector for scams and social engineering. Disable the ability to join games with player-created items for sale to reduce temptation.
For payment controls, Roblox recommends adding a PIN to the account. Go to Settings > Security and enable Account PIN. This requires a 4-digit code before any purchase can go through, which catches accidental or unauthorized buys.
Better yet: manage the payment method yourself. If a child uses your Google Play or Apple account, set spending limits in Family Library (Google Play) or Screen Time (Apple). You can lock purchases behind approval from the parent device, so every Robux buy requires your sign-off.
If you really want to lock it down, don’t link any payment method to the child’s account at all. Load Roblox gift cards with your controlled budget instead. They can only spend what’s on the card.
Monitoring Account Activity and Usage
Check the Login History regularly. Go to Settings > Security > Login History to see when and where your account has been accessed. If you see logins from locations you don’t recognize or at weird times, your account might be compromised.
For parents: have regular conversations with kids about what they’re buying and why. Kids don’t always understand that Robux = real money, so some context is helpful. Ask to see the games they’re playing and the cosmetics they’re buying. It sounds intrusive, but it’s better than a $300 charge you have to dispute.
Set a pattern of checking the billing page monthly. Five minutes of review per month beats scrambling when something’s wrong.
Disputing Unauthorized Transactions and Getting Refunds
Fraud happens. Unauthorized charges happen. Kids buying stuff without permission happen. If you’re facing a charge you didn’t authorize, here’s how to handle it.
How to Report Fraudulent Charges
First, determine if the charge is actually fraudulent. Log into Settings > Billing and check when it happened and what it was for. If you genuinely didn’t make the purchase and no one else on your household account did, it’s time to report it.
Within your transaction history, there’s usually a Report or Dispute option on the transaction itself. Click it and select “Unauthorized charge” or “Fraud” from the dropdown. Roblox will ask for details: did you recognize the transaction, did someone else have account access, etc.
Be specific. Give dates, amounts, anything that proves you didn’t make the purchase. This is where having your login history handy helps, if the charge went through at a time you were asleep or in a different timezone, that’s evidence.
Roblox Refund Policy and Process
Roblox has a refund policy, but it’s not automatic. One-time purchases (Robux, items) typically fall under their “no refunds” policy if you spent the currency on other stuff. But, if you report the charge within a reasonable timeframe (ideally within 30 days), they may reverse it.
Game pass refunds are easier to get if you haven’t used the pass yet or just realized you were auto-charged. Same with Roblox Premium, if you want to cancel and get a refund, do it soon after renewal.
The key is timing. Report disputes within 30-60 days of the charge. After that, both Roblox and your payment provider get less cooperative.
Note: if the Robux or items are already spent and gone from your account, Roblox may not be able to refund them, even if they acknowledge the charge was unauthorized. This is why preventing unauthorized access (see the security section below) is so much more important than trying to fix it after.
Contacting Roblox Support for Transaction Issues
If the in-app dispute tool doesn’t work or you need human support, go to the Roblox Support Portal. Choose “Billing and Payments” as your issue category. Be clear and detailed: include the transaction ID, amount, date, and what happened.
Response times vary, but you should hear back within a few days to a week. Keep records of everything, screenshot the transaction, save the support ticket number, and document any responses.
If Roblox won’t help, your payment provider (your bank, credit card company, PayPal, etc.) is your final recourse. You can file a chargeback, though this is nuclear option and may result in your Roblox account being flagged or banned. Only do it if Roblox support definitively refuses to help.
Securing Your Roblox Account to Prevent Unauthorized Transactions
An ounce of prevention beats a pound of cure. Securing your account properly stops most fraud and unauthorized spending before it starts.
Two-Factor Authentication Setup
Two-factor authentication (2FA) is the single best thing you can do. Go to Settings > Security > Two-Step Verification and enable it. Roblox will ask for your phone number. Each time someone (including you) tries to log in from a new device, Roblox sends a code to your phone. Without that code, login fails.
This absolutely tanks unauthorized access. Even if a scammer has your password, they can’t get into your account without your phone. And since they can’t log in, they can’t make purchases.
Set this up today. It takes two minutes.
Protecting Your Payment Information
Never, ever share your password with anyone. Not friends, not Discord friends you met five minutes ago, not “Roblox staff”, Roblox staff will never ask for your password. Same goes for your email password if it’s linked to Roblox.
If you use the same password across multiple sites, change it on Roblox immediately. Use a unique, strong password, 12+ characters, mix of upper and lowercase, numbers, and symbols. A password manager like Bitwarden or 1Password makes this painless.
When entering payment info, always verify you’re on roblox.com (check the URL), not some phishing clone. Roblox won’t ask you to re-enter your credit card details randomly, if a “Roblox” page is asking for payment info out of the blue, it’s fake.
Review your linked payment methods monthly. Go to Settings > Billing > Payment Methods and remove anything you don’t use. If you spot a card or account you didn’t link, that’s an immediate sign your account is compromised.
Recognizing and Avoiding Scams
Roblox is a scammer’s paradise because the victim pool is huge and skews young. Here are the common scams:
Robux promises: “Click here, get free Robux.” These are phishing links that steal your login. Roblox doesn’t give away Robux through random links.
Item duplication: “Trade me this item, I’ll duplicate it and give you extras back.” Duplication isn’t possible. You’re getting scammed out of the item.
Account recovery scams: “Your account is suspended, click here to recover it.” If Roblox suspended you, they email you from @roblox.com with instructions. Random links are fake.
Fake job offers: “Join our team and earn Robux.” These phish for account access or payment info.
Discord scams: Someone claims they can help with a “rare item drop” or “private sale.” They want your password or payment info. They’re lying.
The golden rule: if someone is offering something too good to be true in a game or social media, it’s a scam. Don’t click suspicious links, don’t share your password, don’t trade valuable items to strangers.
Troubleshooting Common Transaction Issues
Even when you’re doing everything right, problems happen. Here’s how to fix the most common ones.
Payment Failed or Declined Errors
Your card got declined. It happens. Usually, it’s one of a few things: insufficient funds (your bank account is empty or credit limit is maxed), fraud detection (your bank’s security flagged an unusual purchase), or incorrect billing address/ZIP code (you didn’t enter it right).
First, check your bank account. Do you have enough money? Sometimes cards decline for being dormant or expired, if your card expired recently, that’s your culprit.
Second, contact your bank. Ask if they blocked the Roblox charge as fraud. Most banks have a fraud department you can call immediately. Tell them you’re trying to make a legitimate purchase, and they’ll usually whitelist Roblox temporarily.
Third, re-enter your billing info carefully. Double-check the ZIP code and full address against what your bank has on file. Sometimes even a one-character mistake causes a decline.
If none of that works, try a different payment method. Use a different card, PayPal, or Google Play if available. Then contact Roblox support with your failed transaction ID.
Missing Robux or In-Game Items
You got charged but didn’t receive what you paid for. This is rarer than you’d think, but it happens.
First, refresh your page or restart the game. Sometimes there’s just a display lag, and the item will appear after a restart. Check your inventory thoroughly, new items might not show up in an expected spot.
If it’s still not there after 24 hours, go to your transaction history and find the purchase. Does it show as “Completed”? If it’s still “Pending,” wait 48 hours and check again.
If it’s completed but the item is gone, check if you accidentally spent the Robux on something else. Look at your recent purchases in the catalog or game. Sometimes players forget they already used the currency.
If you’re genuinely missing items, file a support ticket with the transaction ID. Include a screenshot of your transaction history showing the completed purchase and your inventory showing the missing item. Roblox will usually restore it within a few days.
Duplicate Charges and How to Resolve Them
You see the same charge twice on your billing page. Before panicking, check the transaction IDs and dates. Are they actually duplicate, or are you looking at the same charge twice (which sometimes happens if you refresh the page)?
If the IDs and timestamps are different, you got charged twice. This is usually a glitch, not fraud. Go to your transaction history and click the Report option on the duplicate charge. Explain that you were charged twice for the same item.
Roblox will investigate. If they confirm it’s a duplicate, they’ll refund the duplicate charge, usually within 3-5 business days.
While waiting, don’t try to make another purchase thinking your payment won’t go through, it will, and you’ll just end up with more duplicates. Wait for the refund to process first.
Best Practices for Smart Roblox Spending
Now that you understand transactions and can protect yourself, let’s talk strategy. Smart spending isn’t about never buying anything, it’s about being intentional with your money.
Budgeting for In-Game Purchases
Set a monthly Roblox budget and stick to it. Maybe it’s $10, maybe it’s $50, whatever works for your financial situation. Write it down. Once you hit that limit, you’re done for the month. No exceptions.
Prioritize what you’re buying. Cosmetics feel urgent in the moment, but they’re not. A game pass that lets you progress faster or a creator’s membership that supports them long-term are better uses of budget than a limited avatar item you’ll forget about in a week.
Track seasonal sales and new releases. Games and cosmetics go on sale during holidays or special events. If you can wait a few weeks, you often save 20-30%. The FOMO is real, but patience pays.
Don’t leave Robux sitting in your account unless you’re saving for something specific. The more currency you have available, the more likely you’ll spend it on stuff you don’t need. Buy only what you need, when you need it.
Taking Advantage of Sales and Promotions
Roblox runs promotions constantly. Limited-time bundles, seasonal sales, creator collaborations, watch for these. Sign up for email notifications from Roblox so you don’t miss deals.
Roblox Premium members get a 10% discount on Robux purchases, so if you’re planning to spend regularly anyway, it can pay for itself. But only if you actually use it and don’t let auto-renewal sneak up on you.
Join communities and forums where players share news about ongoing sales. Sites like Twinfinite often cover major Roblox events and limited-time offers. You’ll catch sales you might have missed otherwise.
When a sale does happen, buy what you actually want, not what seems cheap. A 50% discount on something you didn’t need is still wasted money.
Conclusion
Managing your Roblox transactions boils down to three things: visibility (know what you’re spending), security (protect your account), and discipline (stick to a budget). Check your transaction history regularly, enable two-factor authentication, and think twice before making impulse purchases. If something goes wrong, act fast, report fraudulent charges within 30 days and document everything. Roblox is an amazing platform with incredible games and creators, and supporting it with real money is completely fine. Just make sure you’re in control of how much you spend, not the other way around.